
- How do I care for my native plants?
- How do I take care of blueberries in pots?
- How hard can you prune Rosemary?
- How do I get rid of Lesser celandine that has completely covered my son’s back garden?
Q. How do I care for my native plants?
Native plants are some of the most low-maintenance, easy and practical plants you can grow! Clearly they are living at home in regions where they have survived and thrived for thousands of years so it does make sense.
First of all, make sure you still follow the right plant, right place rules as some native plants prefer or need to be in a continually moist soil or shady location and others love hot dry sun and will even grow along a rocky beach.
I find that the best time of year for planting these days is in fall due to the unpredictable and potentially hot dry spring weather. Planting in autumn before frost (usually October or late September) is a reliable
time to get things in the ground as the weather cools and the rains come. The plants will have a chance
to sit and quietly expand their root system before the spring crazy rapid growth begins.
If you wish to start plants from seed, (always a great way to go, cheaper and a lot of fun!) it’s best to
start them in fall or early spring. Native plant seeds will benefit from a fast-draining soil starter mix, and
cold winter weather (stratification) which is necessary for some species to germinate. Keep the pots or
trays in an outdoor spot which is somewhat protected from extreme weather and wildlife, like under
eaves or in a shed. Keep them constantly moist but not waterlogged. Check for specific planting
information because some seeds need light to germinate!
At planting time dig a hole a bit larger than the root ball and if the roots are packed and plentiful gently
tease them apart and make sure that the entire root ball is moist before planting (a soak in the water
bucket for 15 to 30 minutes is a great idea).
Using a fork for planting instead of a shovel can be easier as the fork will avoid more rocks and break up
the soil and not leave hard slick sides as a shovel might which are difficult for tiny new roots to
penetrate. If roots are sparse, be much, more gentle. Trimming thick tangled roots is not a bad idea because like
pruning, trimming roots will force them to thicken as they regrow.
Don’t add fertilizer or manure as many native plants prefer native or spare soils, but do mulch/ top dress
around the base afterwards. Mulching will keep roots protected from extreme cold, wind or heat, can
add nutrients and if still present in spring will keep moisture in the soil. A valuable growing rule is: “No
bare soil, ever.” A good mulch could be some compost covered in wood chips, bark mulch, stones, or
slightly rotted wet straw/hay. Mulch should be 3-4 inches thick to be effective but don’t allow it to be
smothering the stem or trunk so an indented bowl shape at the plant base is a good plan.
Most native plants are very drought tolerant but this only applies after they are well established, so plan
to keep an eye on watering for the first year minimum.After this, all that they normally need is possibly an occasional watering in summer, a tidy up or shaping prune now and then, and a fresh layer of mulch annually before the weather gets hot.
Grasses can be trimmed in spring as the new growth is coming in. Leaving shrubs, perennials and grasses
in entirety through winter is a perfect way to help overwintering insects and feed the birds at the same
time. Waiting to tidy up as late as possible in spring will save many small lives also, as pollinators begin
to emerge when the weather warms. I once disturbed 5 ladybugs in 8 Miscanthus grasses in their winter
hideaways.
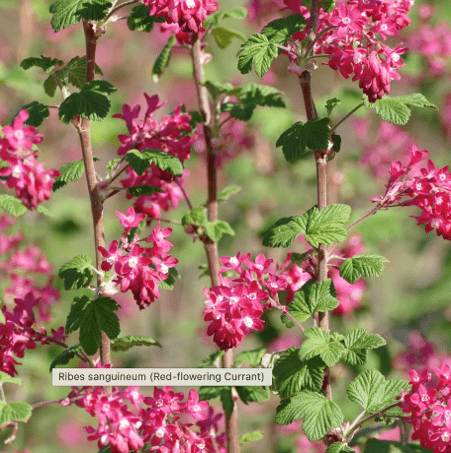
Some great native plants to try growing are Flowering Red Currant (Ribes sanguineum) which is an
important early nectar source for hummingbirds and the first bees coming out of hibernation;
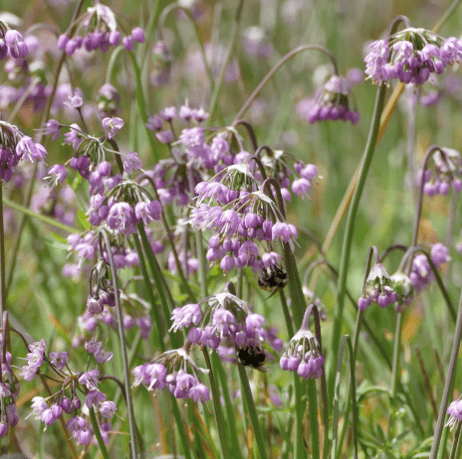
- Nodding Onion (Allium cernuum), a favourite with pollinators and a attractive low growing pink bulb;
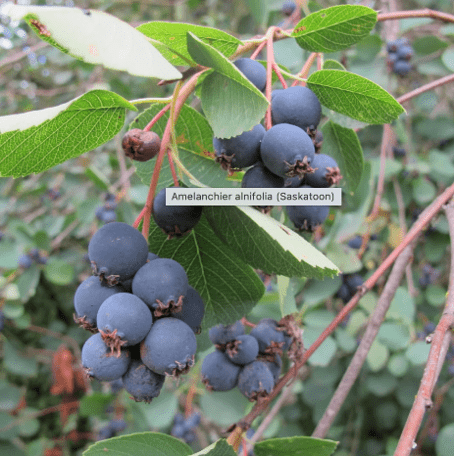
- Saskatoon Berry (Amelanchier alnifolia), if you have a larger space to feed the birds and yourself;
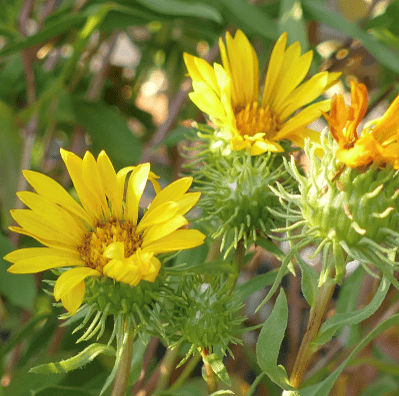
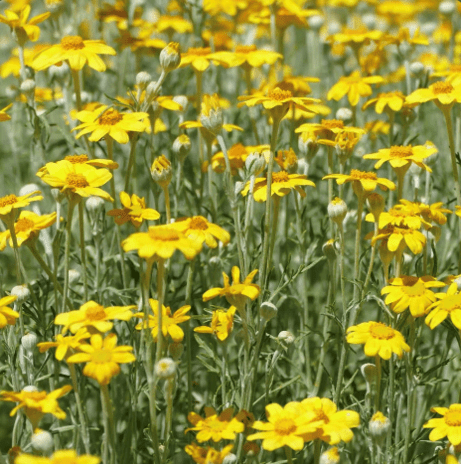
- Wooly Sunflower (Eriophyllum lanatum) or Gumweed (Grindelia species), which are deer and drought resistant with cheerful yellow flowers and later blossoms for insects and interest.
Please check out local native plant nurseries such as Satinflower in person or online for all kinds of great information and plant orders.
Happy planting with native plants!
Sources
Information and photos are credited to Satinflower Nurseries (https://satinflower.ca/ )
Q. How do I take care of blueberries in pots?
Blueberries are a wonderful crop and I once had a blueberry bush in a pot on my deck that gave me over 400 berries each year!
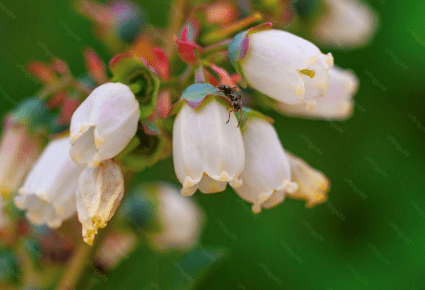
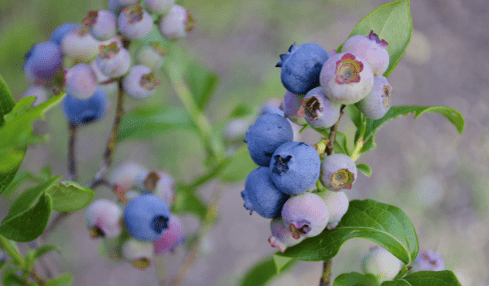
Blueberries need acidic soil but if an acidic soil mix is not available you might wish to add a small amount of acidic fertilizer or sulphur because they will be very unhappy and unproductive if the pH is too high. A pH of about 5 is what’s needed.
Take it out of the current pot and let the root ball sit in water for at least a half hour.
Plant your berry bush into a pot that is 3-4 inches larger in diameter than the current one. Add the new soil to the bottom and tease apart the roots gently so that they are free to grow outward.
If your Blueberry is pot-bound, trim off any masses or circling roots with sharp, clean secateurs at the bottom as this will encourage better new root growth.
Make sure to keep the same soil level so that roots are covered but soil is not covering the main stems.
For a reliable crop, or more berries, you want to have two bushes near each other but if there are others growing nearby you‘ll likely be ok to trust the pollinators to help you get berries. Planting bee attractant spring flowers next to your bush is pretty and helpful.
Make sure that the pot/roots are protected from hot sun and you may want to add some mulch to the top of the soil making sure to keep the stem clear. A good mulch might be conifer needles which are often abundant, free and slightly acidic.
An organic pH neutral or acidic fertilizer applied in January can help get more flowers and fruit.
Water deeply once a week as needed and make sure that water is getting to the bottom of the pot. Be wary of water than merely runs down the sides of the pot and out the bottom. An effective way to water is to sit the pot in a deep tray so that water can soak up from the bottom.
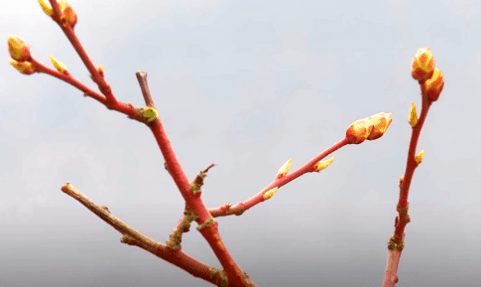
Pruning out the old stems in January or February will keep your bush healthy and encourage younger fruit bearing stems to grow. The old stems will be grey while newer growth will look red and vigorous.
First remove DDD (Dead Diseased or Damaged) branches and stems. Look for the fat fruit bearing buds and cut old stems at the base. Aim to remove no more than a third of the plant at a time.
Fertilize after pruning in late winter and you’ll be sure to get lots of delicious berries!
Sources:
Sources:
For information on Blueberry pest and disease in BC please see
https://www.canr.msu.edu/news/gibberellin-use-for-fruit-set-on-blueberries
https://www.thompson-morgan.com/pruning/blueberries
Q. How hard can you prune Rosemary?
Rosmarinus officinalis, commonly known as Rosemary, is a shrub with fragrant, evergreen needle-like leaves and purple or sometimes white, pink, or blue flowers. It is a member of the mint family, Lamiaceae. and native to the Mediterranean region. It has numerous cultivars and its leaves are commonly used as flavouring.
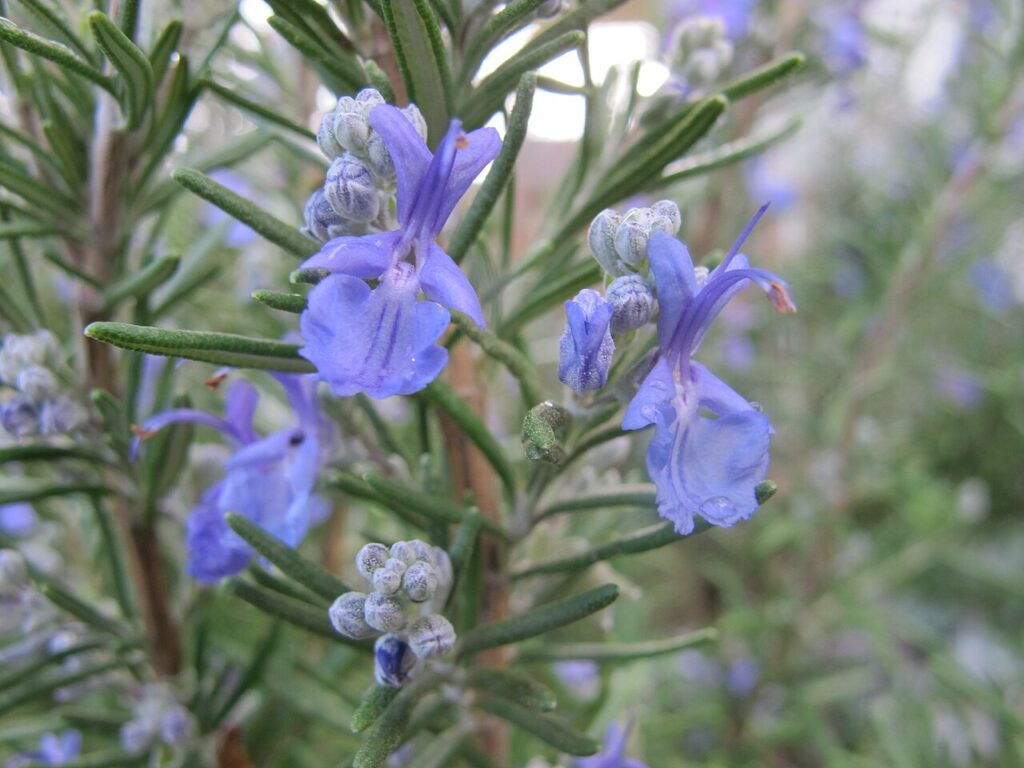
The plant has a fibrous root system and flowers in spring and summer in temperate regions but may be in constant bloom in warm climates. The branches are dotted with groups of 2 to 3 flowers down their length. Rosemary also tends to flower outside its normal flowering season; it has been known to flower as late as early December and as early as mid-February in the Northern Hemisphere. The plant can live as long as 35 years. It is very easy to grow and needs little maintenance once established. Since it is attractive and drought-tolerant, Rosemary is used not only as a culinary herb but also as an ornamental plant in gardens and for xeriscape landscaping. It is considered easy to grow and pest-resistant and can grow quite large, retaining attractiveness for many years. It prefers a site in full sun with light, free-draining soil. Rosemary hates having wet roots, especially in winter.
Rosemary is evergreen, so can be harvested all year round, but the soft new growth in late spring and summer has the best flavour. Snip off shoots as required, aiming to keep an attractive shape to the plant. The leaves can be used fresh or dried for later use. To dry rosemary, hang up sprigs in a warm, dark, well-ventilated place. When fully dried, strip off the leaves and store in an air-tight jar.
To keep rosemary compact and encourage fresh young foliage, trim it back lightly every year after the flowers fade, but avoid cutting back into old wood. Varieties with an upright habit can be grown as a neat hedge if trimmed annually. Left unpruned, rosemary will become leggy, woody and bare at the base. As they don’t usually recover from heavy pruning, old straggly plants with a lot of bare, woody stems are best replaced. You can purchase new plants from a reputable nursery or garden centre but it is also easy to take cuttings from a plant that needs to be replaced and create free new plants which will be clones of the original.
Cuttings can be of two types:
1) Softwood cuttings have the highest rooting potential of any stem cutting and often provide the best chance of rooting. The cuttings are taken in spring and early summer, from the tender new growth of the season.
Collect material early in the day when it is full of water (turgid).
Collect non-flowering shoots, as they will root more readily.
Remove up to 10cm (4in) of shoot, cutting off the material neatly above a bud on the parent plant.
Place the cuttings material in a clean plastic bag. Store the bag of material in the fridge if you cannot prepare the cuttings immediately.
Remove the lower leaves and pinch out the soft tip. Poke holes at least an inch or two (3-5 cm) deep around the outer edge of a container of peat-free compost or potting soil mixed with a little sand. Plant the cuttings up to the first set of leaves, firming the soil gently around them then water from above to settle the compost. Ensure the soil remains moist but not soggy.
Place the pot in a closed plastic bag in a warm location but not in direct sunlight.
Open the bag for a few minutes every few days to ventilate.
The cuttings should root in 4 – 6 weeks.
2) Hard wood cuttings are taken in the fall in much the same way as softwood cuttings. Select a 4 -6’ piece that is hardwood at the bottom but with a soft tip. Remove all but the top few leaves and continue as per softwood cuttings. You can also take a ‘heel cutting’ by pulling a shoot downwards and taking a ‘heel’ of stem with it.
The amount of old woody growth on your Rosemary bush will determine whether it can be pruned or whether you should replace it.
Sources
https://www.rhs.org.uk/herbs/rosemary/grow-your-own
https://en.wikipedia.org/wiki/Rosemary
Photo: By Margalob – Own work, CC BY-SA 4.0, https://commons.wikimedia.org/w/index.php?curid=47807064
My own herb garden
Q. How do I get rid of Lesser celandine that has completely covered my son’s back garden? My grandchildren play outside there all the time.
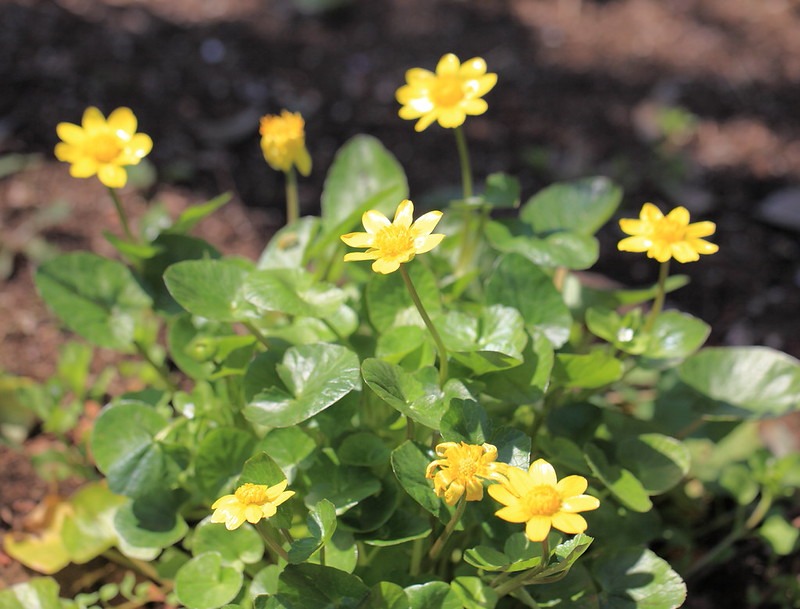
Ficaria verna, (previously Ranunculus ficaria) commonly known as lesser celandine, fig buttercup or pilewort, is a low-growing, hairless perennial flowering plant in the buttercup family Ranunculaceae. It has fleshy dark green, heart-shaped leaves and distinctive flowers with bright yellow, glossy petals. Lesser celandine is native to Europe, northern Africa, western Asia, and Siberia. It is believed to have been first introduced to North America as an ornamental in the mid-1800s and escapes were reported in Pennsylvania in 1867. Dense colonies were originally associated with moist soils near streams or around spring seeps. Lesser celandine continues to be found in those locations; however, lush aggregations are now commonly found blanketing well-drained gardens, woodlands, hillsides and hilltops.
It is a “spring ephemeral” meaning it spends most of the year hidden from view underground. The plant’s shoots typically emerge as early as late January to February with flowers beginning to bloom in March and April. By June, the vegetation has died back and the plant becomes dormant as trees fully leaf out. The plant’s hide-and-seek life cycle makes detecting and evaluating the extent of spread a time-sensitive endeavor. The roots are tuberous, and detachable bulblets (small bulb- or tuber-like reproductive structures) can also form where the leaves join the stem. It is very short ground cover about 3 to 9 inches tall and about 1 foot wide. The plants form a carpet of foliage with no above-ground growth present during dormancy. The glossy yellow daisy-shaped flowers are bright yellow with eight to 12 petals and stalks long enough to hold them above the foliage. The base of the petals surrounding the flower center are darker, looking as if they were water-soaked. The leaves are simple (not divided into leaflets), kidney shaped with slightly lobed or angular margins and smooth with a waxy texture. They are arranged alternately on the stems, though the plant is so compact this trait is hard to see.
This invasive plant creates a dense carpet of vegetation that smothers other species. It is also toxic to most mammals causing sickness in livestock and rare deaths. Its ability to reproduce in two ways both vegetatively by means of bulblets that scatter as the foliage dies back, plus seed from pollinated flowers, make it an aggressive spreader. Lesser celandine can be managed without the use of herbicide, but the process takes more effort and time and may not always be fully effective. After the plants go dormant, the only way to remove them is by screening the bulblets and tubers out of the soil manually. Due to their small size and variable depth, and the requisite soil disturbance, this is not practical where lesser celandine has invaded lawns, garden beds, or wooded areas. The successful removal of established lesser celandine colonies may take many years of pulling or digging the plants out of the ground during the brief period of time they are actively growing. This can be a good opportunity for a ‘weed pulling party’ with friends and neighbours as the celandine can easily spread to neighbouring properties. Lesser celandine can wreak havoc on our native plants in its short lifecycle which makes early detection and control key to protecting our native nectar sources of spring.
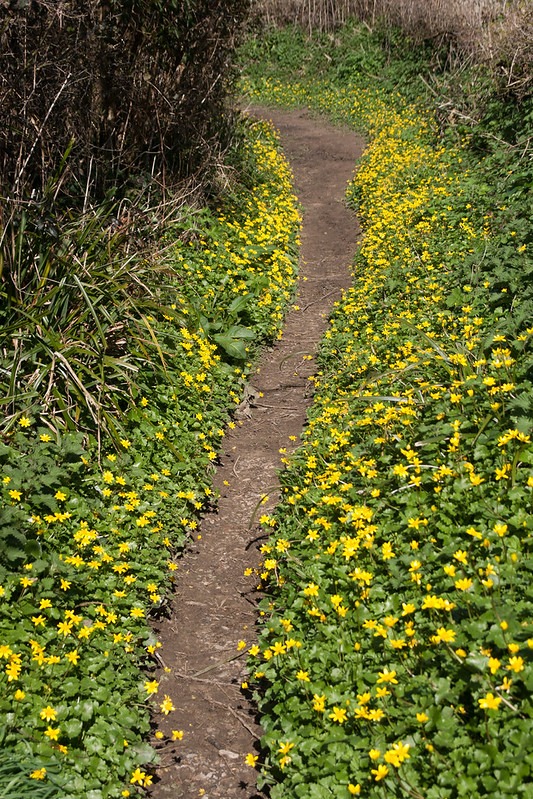
Smothering a patch to deprive the plants of light might weaken them if begun promptly as soon as new growth emerges in early spring, while mowing the leaves off could also help weaken the plants although they usually grow too short to be cut by a mower. A string trimmer used to selectively mow-down a patch may work. One risk of mowing is accidentally dispersing any bulblets present. Removed plant parts should be bagged and disposed of as garbage and should never be composted.
Herbicides are not recommended both because of the toxicity to humans, animals and other plants but also the very limited window of time when herbicide can be absorbed by live foliage to have any effect.
Sources
//en.wikipedia.org › wiki › Ficaria_verna
(For illustration only) https://www.istockphoto.com/photos/lesser-celandine
https://extension.umd.edu/resource/lesser-celandine